Adding a User
A IntelliTrack user is a person who operates the IntelliTrack software. An unlimited amount of users may be added to IntelliTrack. A user meets the following requirements:
- Has a username.
- Has a password.
- Is assigned to a site or sites (for more information about a user's default division and default site, see "User Preferences").
- Is assigned a user role or roles (for more information about user roles, see "Role Based Security").
How to Add a User
To add a user, follow the steps below.
- Select Security > User Management.
- The User Management page appears.
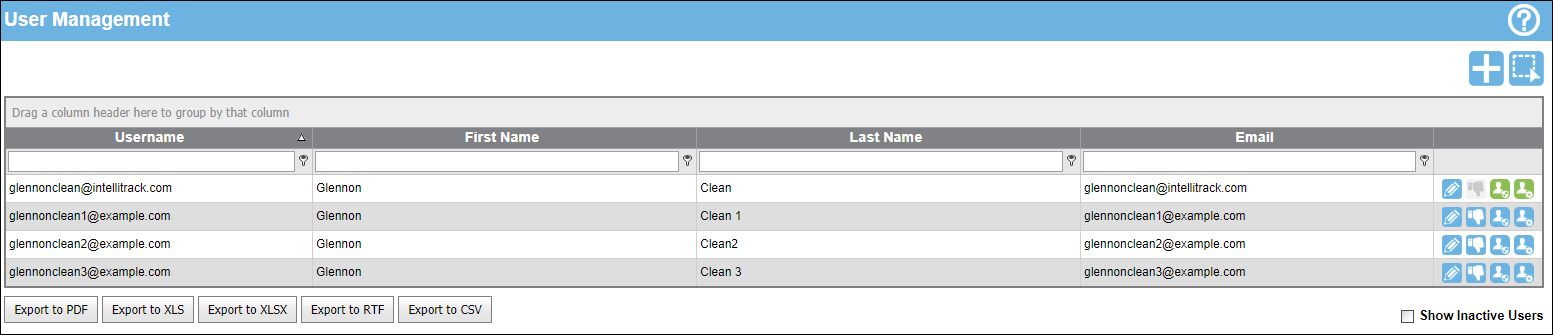
- Select the Add icon.

- The Add User form appears.
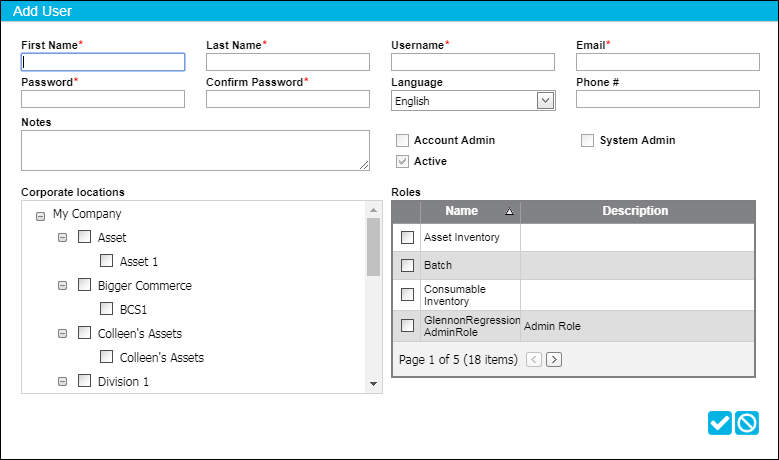
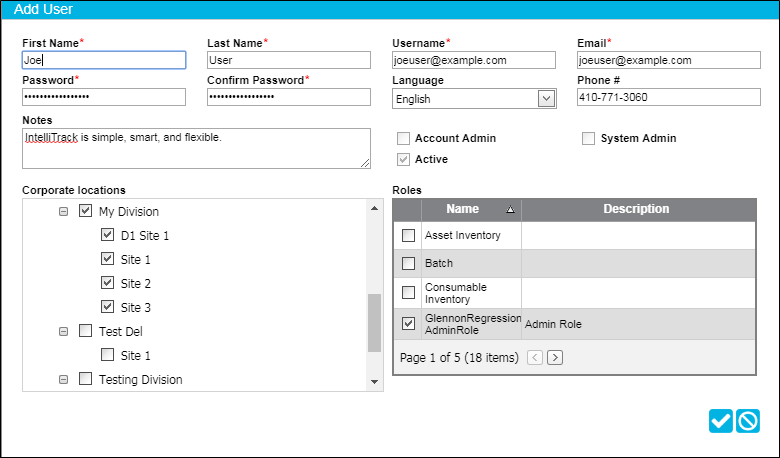
- First Name (required): Enter the user's first name in the First Name field.
- Last Name (required): Enter the user's last name in the Last Name field.
- Username (required): Enter the system username for this user in the Username field. The username must be in email format (for example user@example.com).
- Email (required): Enter the user's email address in the Email field.
- Password (required): Enter the user's password in the Password field.
- A "strong" password is required. This means that the password must have between 8 and 50 characters, contain at least one uppercase, one lowercase, one decimal digit (0-9), or one special character (!, #, $, %).
- Confirm Password (required): Re-enter the user's password in this field to confirm it.
- Language: click the drop-down arrow and select the default language for this user from the options that appear. IntelliTrack will be localized for this language when this user logs into the application.
- Phone Number: enter a phone number for the user in this field.
- Account Admin checkbox (read-only): when marked, the user is set as the Account Admin.
- System Admin checkbox (read-only): when marked, the user is set as the System Admin.
- Active checkbox (read-only): when marked, the user is considered active in the system. An active user can log into the system and use the application.
- Notes area: In the Notes area of the form, enter notes about this user.
- Corporate locations: In the Corporate locations portion of the form, the company, division, and site groupings are shown in an expanded tree-view. Here, select the division and sites that the user has access to. The user is able to add items, inventory, and perform transactions for any site he/she has access to. Additionally, the system will automatically set a default division and site for this user based on the selections made here.
- Role: In the Roles portion of the form, you are able to assign a role or roles to this user by marking the checkbox to the left of the role. (A user may have one or more roles. If a user is not assigned any role or roles, the user cannot use system features. For more information on user roles see "Role Based Security".)
- Select the Save icon
 to close the Add User form and add this user to the application. The Add User form closes. You are returned to the User Management page. The user has been added.
- To cancel adding this user, select the Cancel icon
 to close the Add User form. You are returned to the User Management page. The user has not been added.
- To cancel adding this user, select the Cancel icon
Division and Site Access
A user is assigned division and site access in the Corporate Locations portion of the Add User form; see step 11 above or the following section, see "Assigning a Division and Sites to a User" for more information.
Editing User Information
Once a user is added, the user information may be changed; see "Editing a User" for more information.
Inactivating a User
Once a user is added, the user may not be deleted. However, a user may be inactivated as an alternative; see "Deactivating a User" for more information.